Preliminary Step: Create Your Free Flick Account
Before we get started you will need to setup an account with Flick.
You can click here to get a free trial with them.
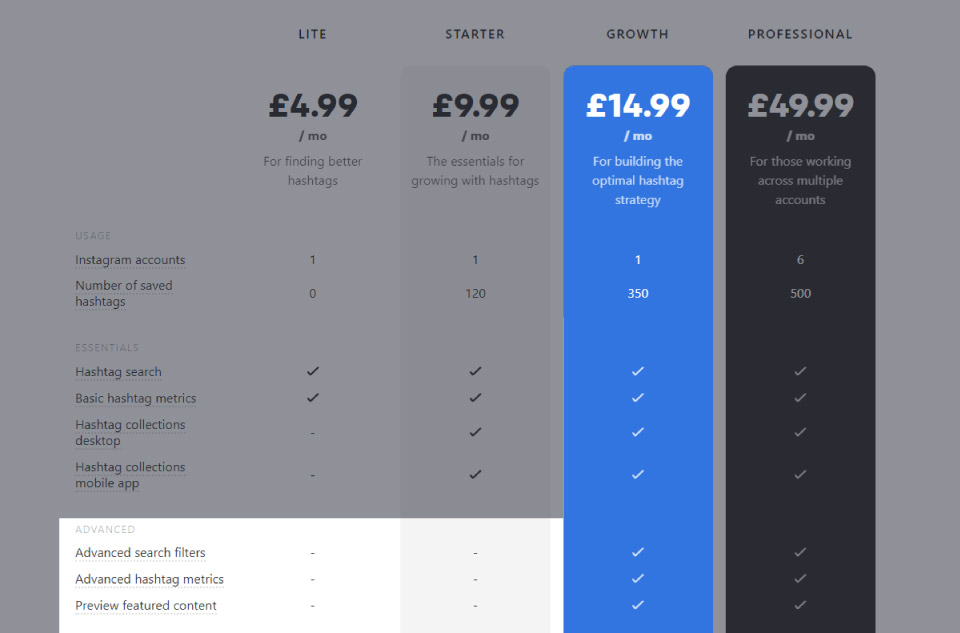
If you are looking to upgrade your account at any time — to access their analytical features — I recommend getting the GROWTH Plan as it allows you to get Advanced Hashtag Metrics which will help you make data-driven decisions:
Step #1: Connecting Your Instagram Profile To Flick
Once you have a Flick account, it's time to connect your Instagram profile to the dashboard.
This allows you to use Flicks Suggested Filters which are incredibly powerful for finding hashtags that work for your profiles current follower and engagement count.
To do this simply follow these steps:
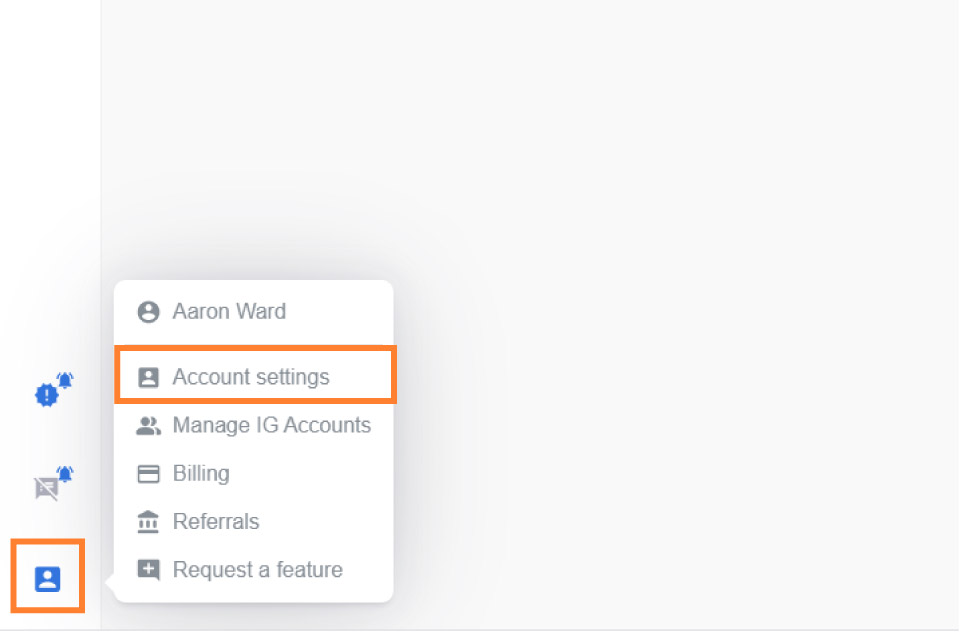
Open Flick and go to your Account settings found in the bottom right of your interface:
Then open the 'Instagram Accounts' tab and click Link Accounts:
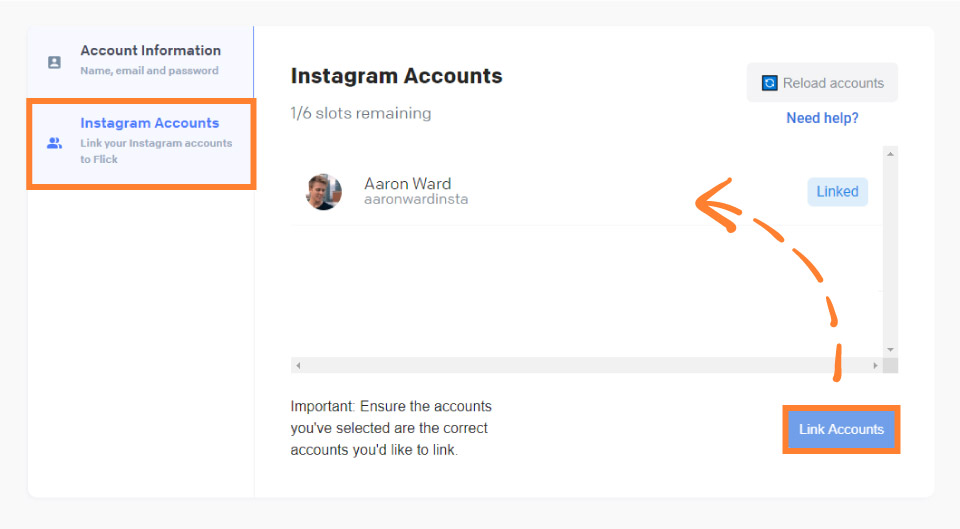
Once done, you should see your Instagram account Linked.
Step #2: Finding Hashtags That Increase Your Reach & Engagement
Visit the Find Hashtags/Explore tool in your Dashboard. It's the one on the top right that has a search icon:

Next, click Active Suggested Filters:

It should show now that Suggested Filters are Active:
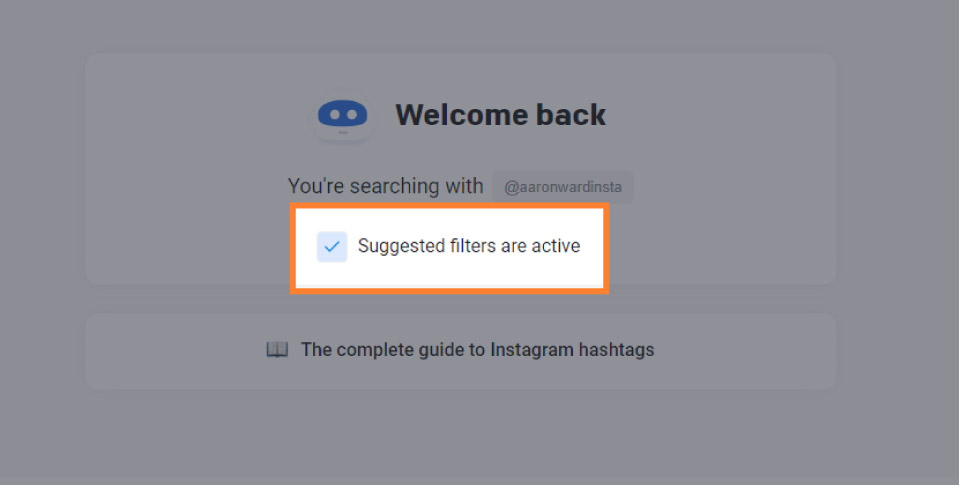
This tells Flick to only find hashtags that will specifically work best with your current profiles engagement and follower count.
When you enable this option, Flick looks at the number of followers you have and the average engagement you are getting on your current posts. Then when it searches for hashtags, it looks to see if your current engagement will allow you to rank in the Top Posts for the hashtags you end up using — this helps you increase reach, boost engagement, and gain more followers!
Next, in the search bar enter a keyword related to your profile or the content you post.
For example if your Instagram profile is your Corgi then searching "corgi" is a great start as you want specific and relevant hashtags to the content you're uploading.

As another example if you're an online coach you could start by searching "coaching"...

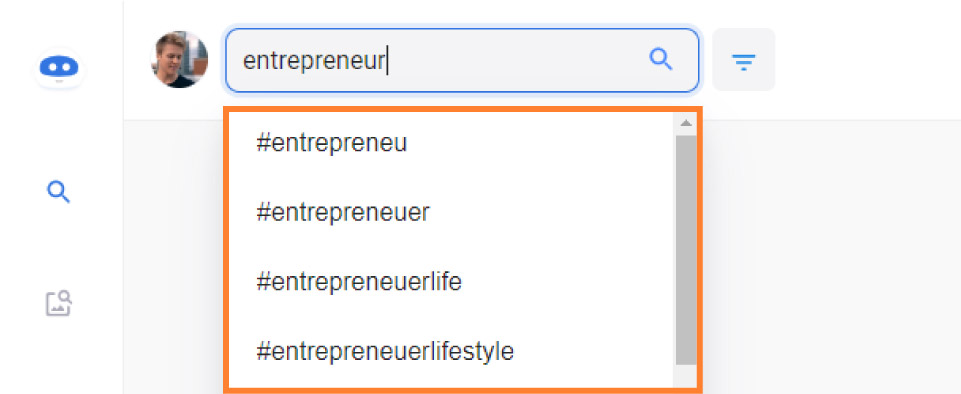
...or "entrepreneur".

There is no wrong or right way of doing this, as you'll be doing multiple searches to build up a set of hashtags that you can use.
The more you search, the better hashtags you'll find!
If you get stuck, Flick will help by showing recommended searches too:
To continue, we will be pretend that we need to get hashtags to use on posts related to a cute Corgi.
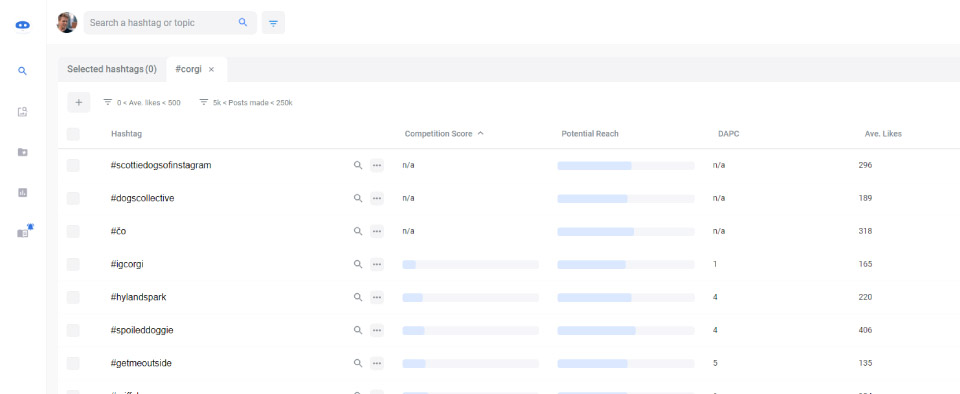
So we did our search for Corgi:

And then you get shown your results:
Important:
Make sure you are viewing your results in the Table View (found in the top right of your interface):

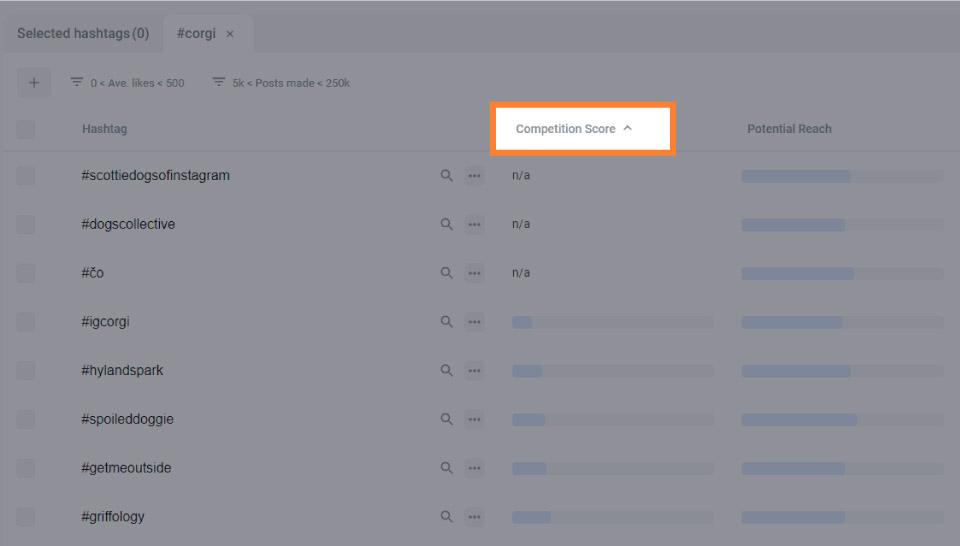
What you want to do here is sort your results by the Competition Score from Low to High:
Step #3: Picking The Best Instagram Hashtags For Your Profile The First Try
Now you have your results it's time to create a collection of hashtags.
For optimal growth, I recommend using 20 hashtags per post.
It's a sweet spot that has worked great for my clients and customers inside of Instagram Masterminds.
If you are uploading posts on different topics or subjects, then you'll want to create a unique collection of hashtags for those types of posts.
For example, you may have a collection of home decor hashtags, fashion hashtags, mom hashtags, and lifestyle hashtags if you are a Mom Blogger/Influencer.
I'll show you how to create a collection after you select your hashtags first.
Finding 10-15 Long Tail Hashtags
The first hashtags you want are called long-tail hashtags.
These are specific hashtags related to your content that help you get seen without much competition (not a lot of engagement and uploads daily).
You'll want 10-15 of these hashtags out of the 20 you'll be using on each post.
To get this right, you need to hit 'The Sweet Spot'.
This consists of picking out the hashtags that have a Low Competition Score with a Medium to High Potential Reach.
For example our corgi results has a few of these hashtags:
- #igcorgi
- #chorgi
- #ilikebigmutts
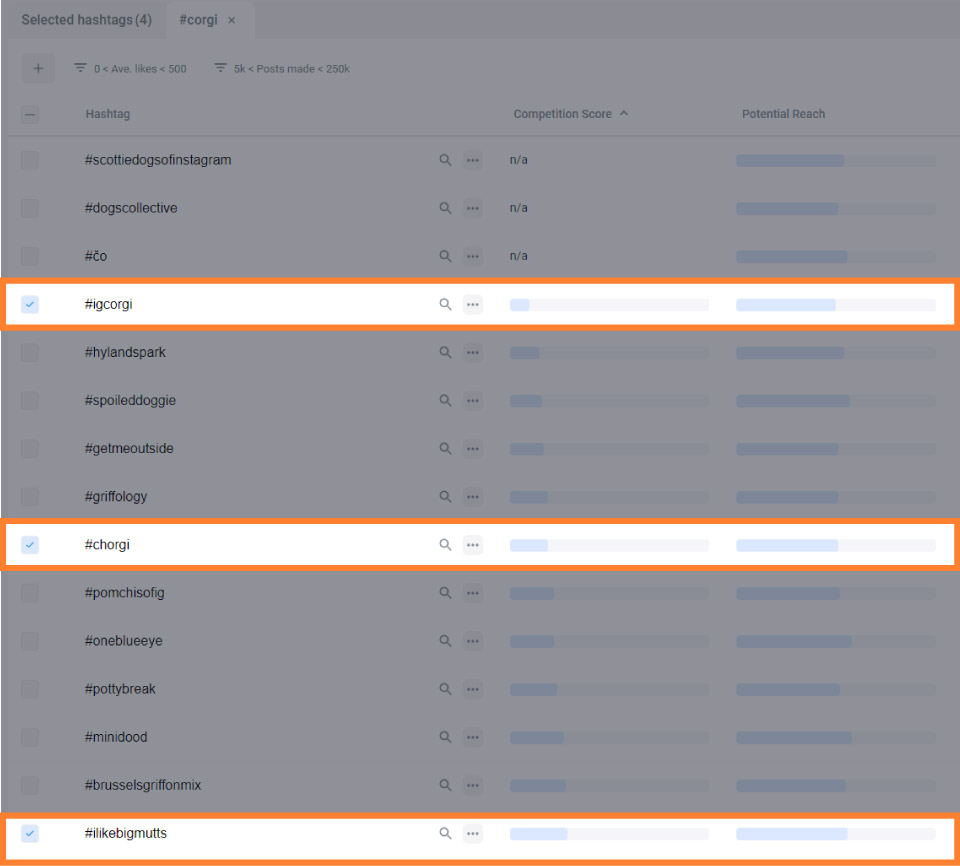
Keep in mind I've selected hashtags that make sense using initiative and other reasons I share below.
Your results may have more or less hashtags with low-medium competition and medium-high potential reach. If you find no hashtags that will obviously work, then try searching a different keyword.
Next:
You want to consider the following to get the best performance from your hashtags:
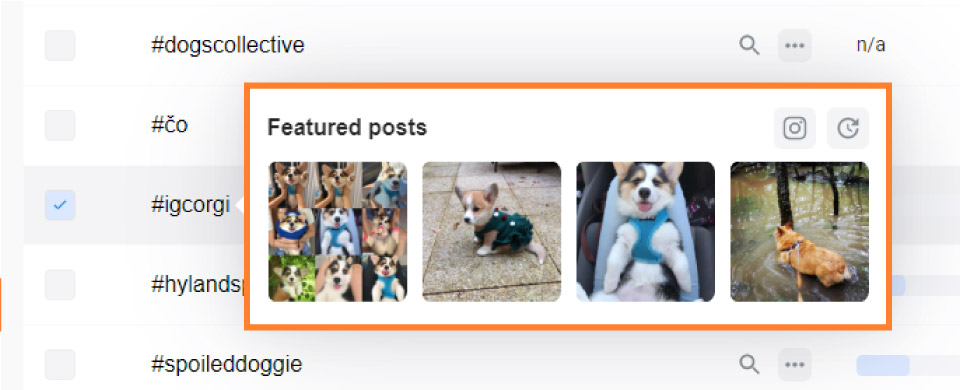
The Featured Posts
Take a quick look at what is currently being uploaded in the hashtag results. This will give you an idea if your content would work in this hashtag.
For example, #igcorgi shows us that our Corgi photos would work for this hashtag:
Instagram's Algorithm using machine vision to scan pixels on images and see if the content is relevant for a hashtag. If it's not relevant then Instagram will give your profile a negative Goodness Score.
For example, don't upload a picture of a beach with no one in it and use #selfie.
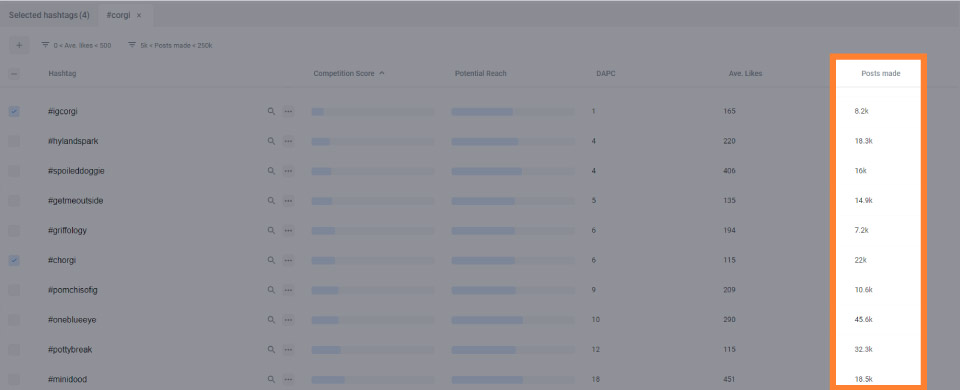
The Number of Posts Made
You don't want to be using hashtags that have no activity, as you'll gain no views.
Make sure the hashtags you are picking have at least 5k+ Posts Made.
You can see this information in the Posts Made column:
Finding 5-10 Viral Hashtags
Next you want to find 5-10 hashtags that have any Competition Score and ONLY a High Potential Reach.
These hashtags are usually a little more broad, and have more Posts Made along with a high amount of Daily Average Posts Created (DAPC).
The hope here is that one day your post will reach the Top Posts spots for a hashtag, driving you tons of views on your profile.
This is especially possible if you follow my content creation advice inside of my Free Instagram Marketing Mini Course.
So for our example #corgi would be a great one to use as it has a High Potential Reach and we can see it's popular due to it's DAPC of 5.1k (Daily Average Post Count):

Final Step: Expanding Your Hashtag Search
It's likely that you didn't get all of your hashtags on your first attempt.
As you can see above, our example only got 4 hashtags out of our 20.
So instead:
You can either:
- Start a brand new search with a different keyword and do the steps above again
- Or you can expand your search...
By expanding your search you can find more high performing hashtags by using your current results.
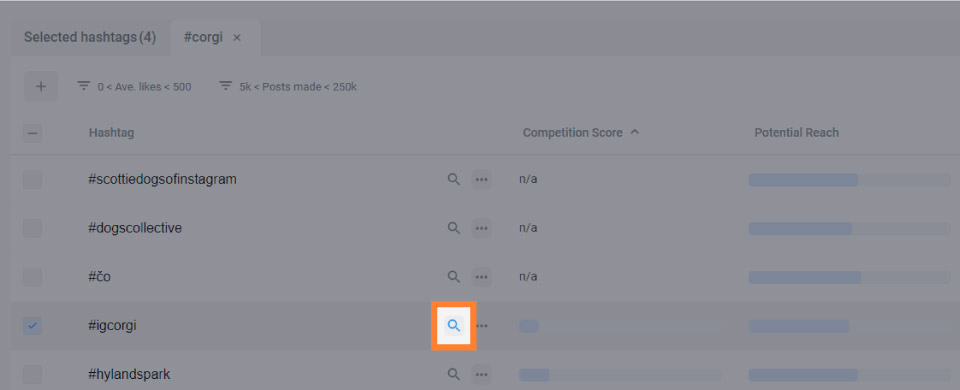
To do this, click the Search Icon on a hashtag.
For example, we can expand our search by using #igcorgi:
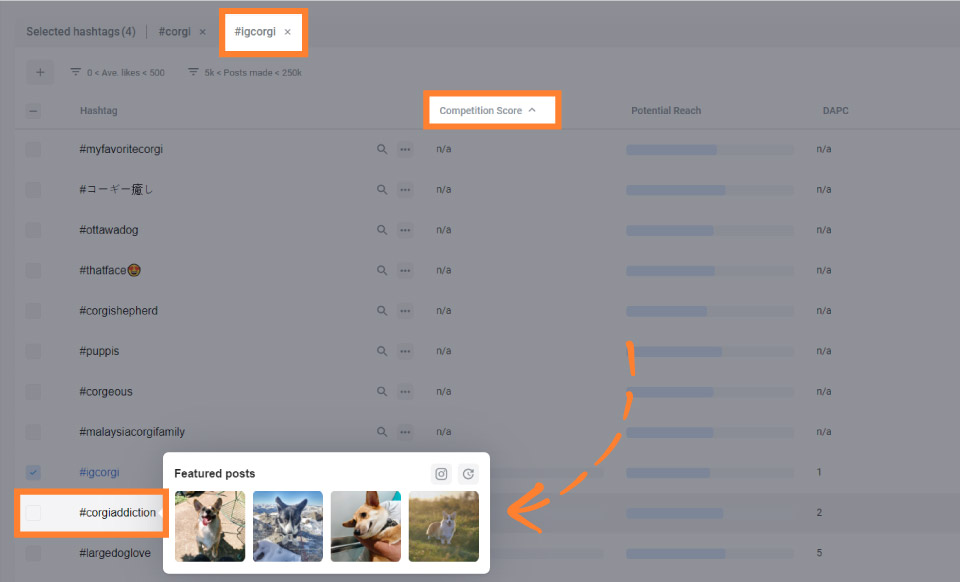
You'll then get new hashtags based on that hashtag.
Which can lead onto new unique discoveries, such as #corgiaddiction in our example:
Rinse and repeat this process until you have 20 hashtags selected.
As you can see here, to get 20 hashtags these are the searches made:
Step 5: Saving Your Hashtag Collection
Collections make it super easy to store hashtags together, so that you can see how they perform together and simply copy them onto your posts quickly.
By now you may have noticed that on the right hand side of your interface hashtags have been added to a collection.
Flick also shows you how many low, medium, and high competition hashtags you have selected:
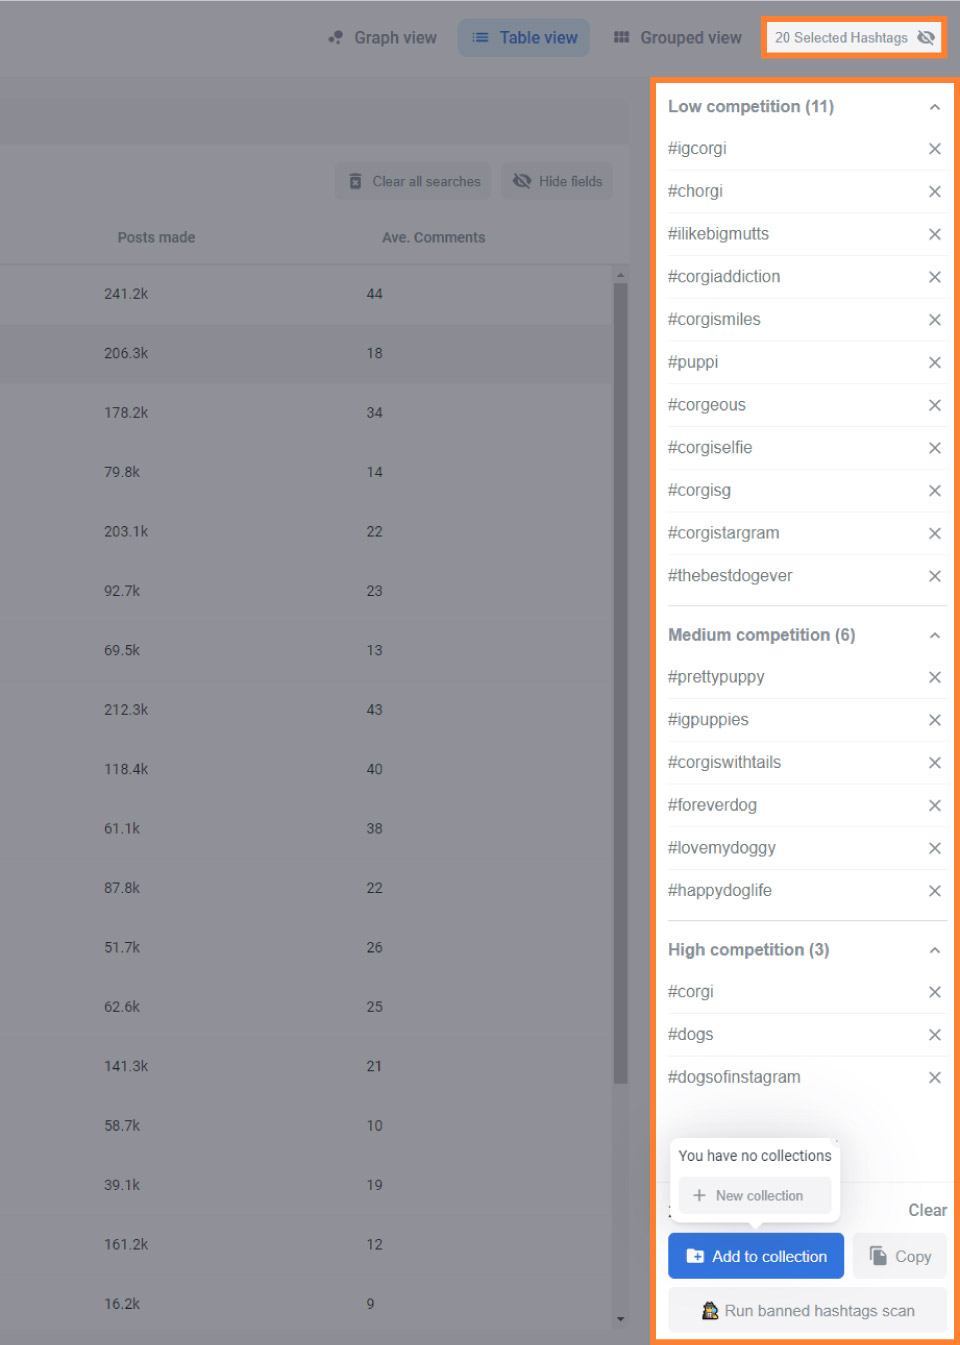
A good rule of thumb here is to have:
- 10 Low Competition Hashtags
- 5 Medium Competition Hashtags
- 5 High Competition Hashtags
Your numbers don't need to be perfect, this is just a good template to work towards.
Removing Banned Hashtags
Before we create your collection, you want to remove potentially banned hashtags.
By doing this, we reduce your chances of being blocked on Instagram (if you post with a banned hashtag your post may be blocked from all other sources, such as the explore page, other hashtag feeds, and even peoples home feed).
To do this, click Run Banned Hashtags Scan:
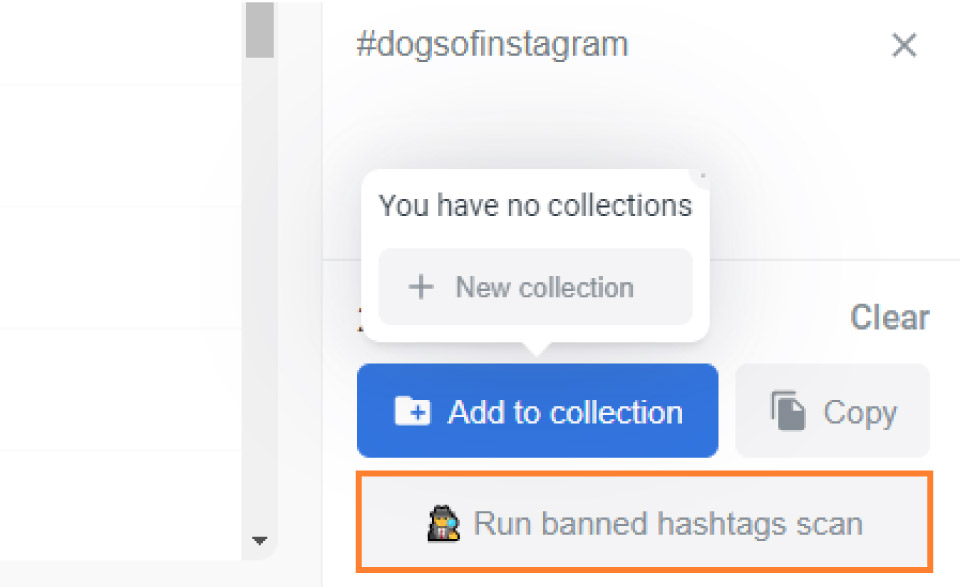
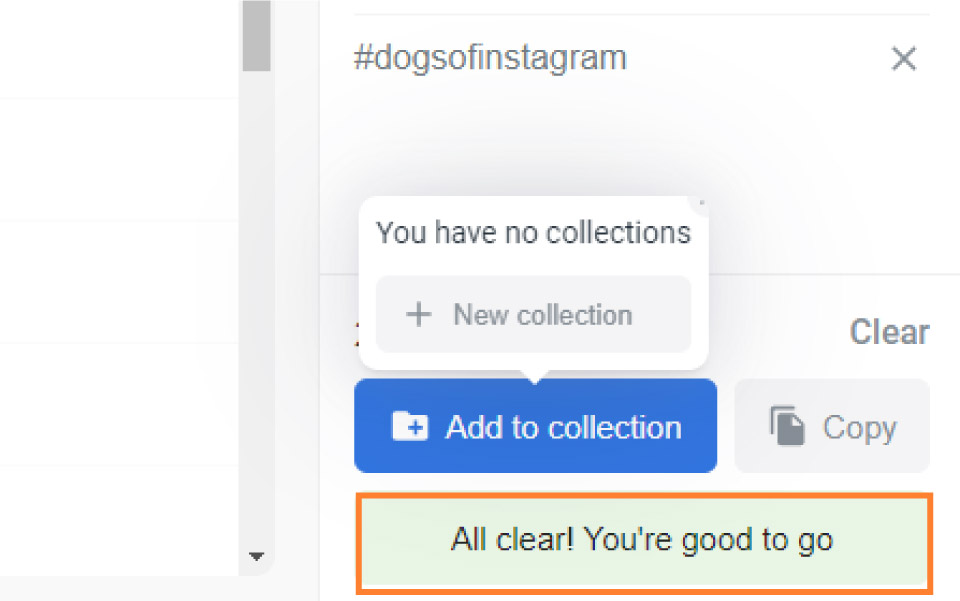
You'll then see your results, for our example there are no banned hashtags:
Creating Your Collection
Once you've got 20 hashtags and run the Banned Hashtags Scan...
...click Add To Collection and then + New Collection:
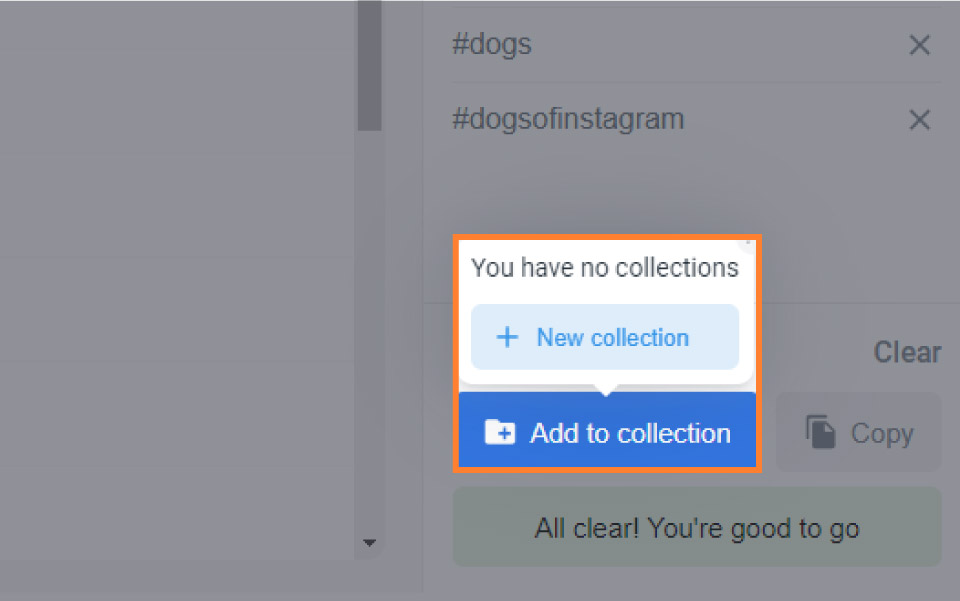
Then name your Collection something that makes sense and click + Create.
For our example, we will call it Corgi Hashtags #1:
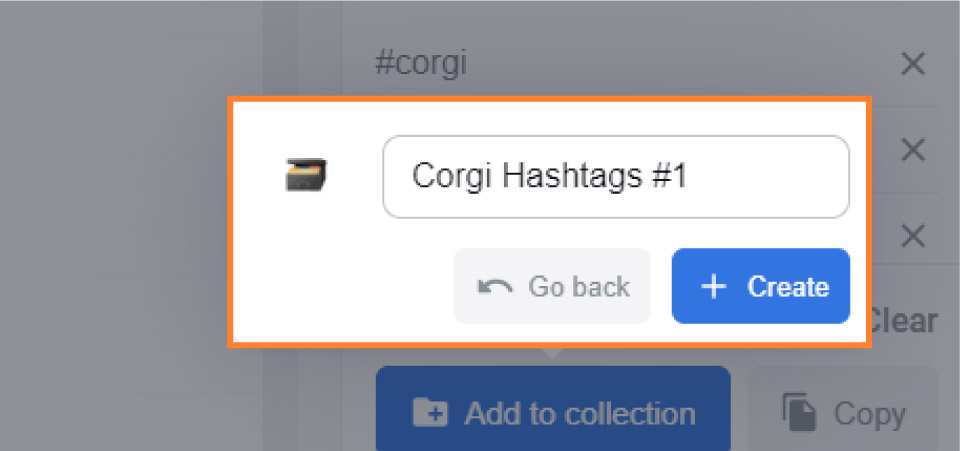
The reason why we called our collection Corgi Hashtags #1 is because after you start using your hashtags and jump into the analytics, you'll want to start working on building another new collection to compare performance against.
In this case we would go and create a Corgi Hashtags #2 collection or we could test it against a hashtag collection of High Potential Reach only hashtags.
That's why Flick is so great, it allows you to quickly build different collections of hashtags to test the performance of.
Step 6: Using Your Hashtags
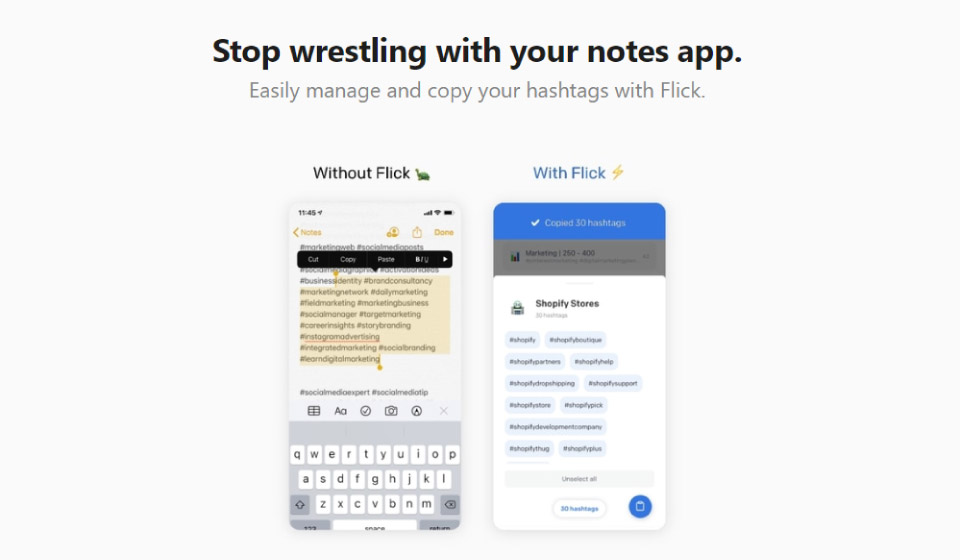
I highly recommend you install the Flick Hashtag Assistant app to manage your hashtags and have quick access to them.

The app is super handy if you're posting from your phone, as before you would have had to store them in a note taking app and update them every time you make a change...
...whereas Flick auto updates if you make changes:
However, if you automatically upload your Instagram posts then you can directly access your hashtags inside of your Hashtag Collections:

You can copy your hashtags (top right of your interface):

Add Your Captions
When you post on Instagram, add your hashtags to the bottom of your caption.
For example, when using Later to schedule and post with, you can add them to the caption:

Alternatively, you can place them in your first comment.
It doesn't matter where you place them, it's down to personal preference.
I like to put hashtags in the caption, as that way I know as soon as the post goes live it's INSTANTLY placed in the hashtags, compared to the short delay from creating your first comment.
Step 7: Analyzing Your Hashtags Performance
Testing is critical for your success.
Most people think they do one search and magically everything works...
...if only life was that easy.
Instead you need to:
- Try posting with 20 hashtags for two weeks
- Then post with only 10 hashtags for two weeks
- Try a different collection of hashtags
- Try using only low competition hashtags
- Try using only high potential reach/competition hashtags
And then look at the results inside the Flick Analytics dashboard:

Head into your Hashtags > Insights:

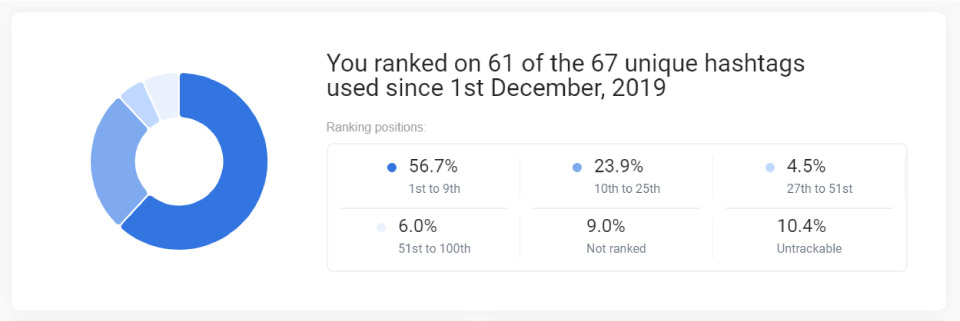
You'll be able to see an your performance overview:
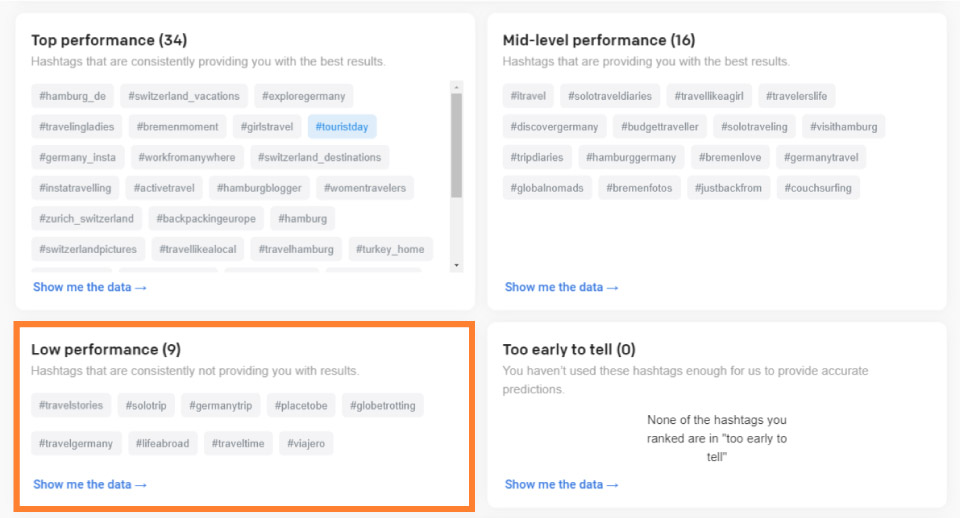
Plus your hashtags performance (Top, Mid-level, and Low).
You'll want to pay most attention to your Low Performance hashtags:
Next you can click Show me the data or...
Visit your Hashtags > Analyse dashboard:
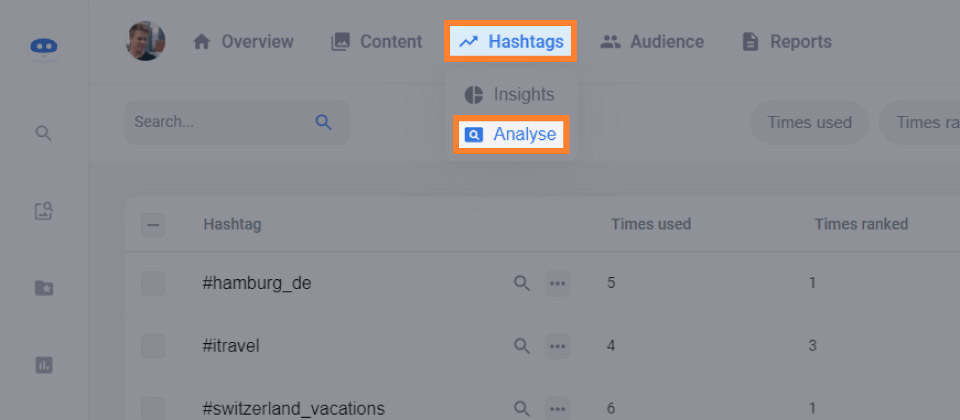
You'll then see all the hashtags you are using in a table view:
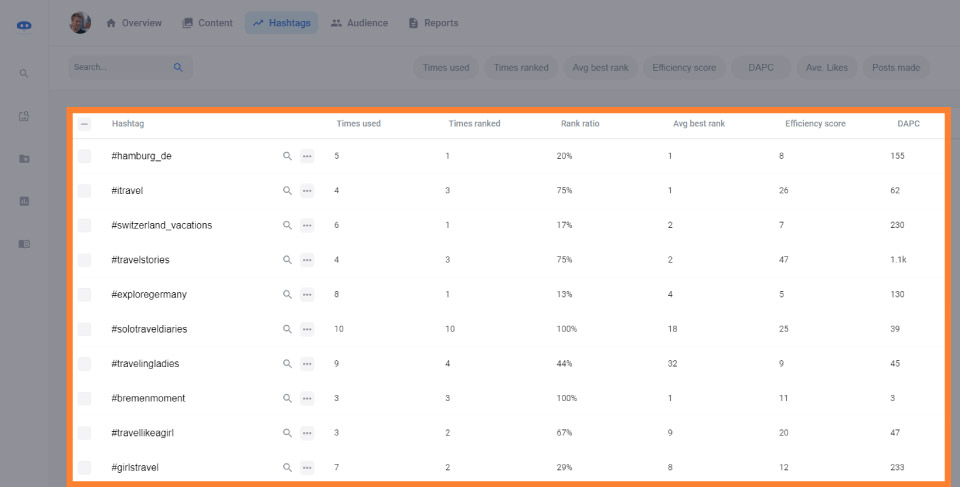
Next:
Filter your hashtags using the buttons up top:

Add two filters:
- Times Used: 10+

- Efficiency Score: 0-30
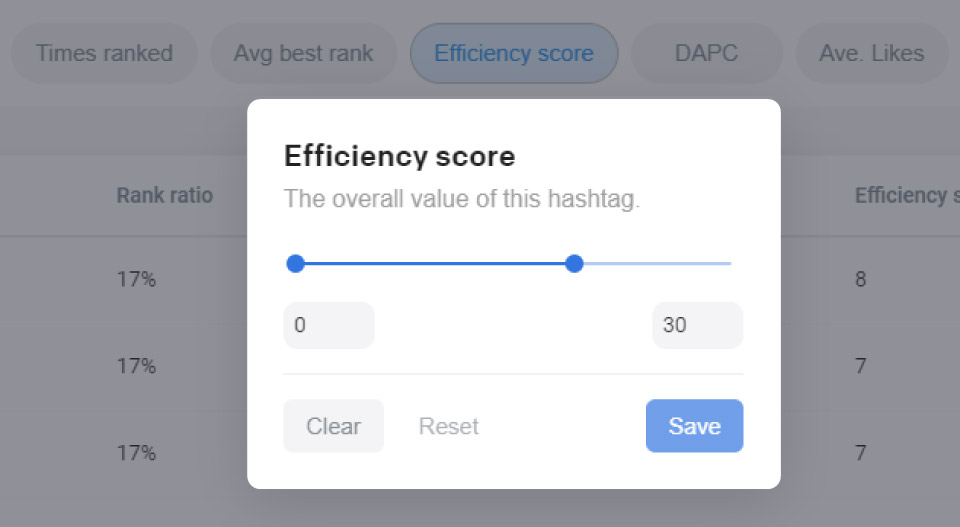
This allows you to see what hashtags are performing best for you and which ones worst.
Now you can make data-driven decisions on what to keep using and what to remove.
For example, we can sort by lowest Efficiency:

Then delete the hashtags from your collection.
Create a High Performing Hashtag Collection
You'll also want to be consistently optimizing a top performing hashtag collection so that your posts get the most engagement and reach.
To do this, add the same filters like we did above:
- Times Used: 10+

- Efficiency Score 30+

With your results, select the best hashtags:
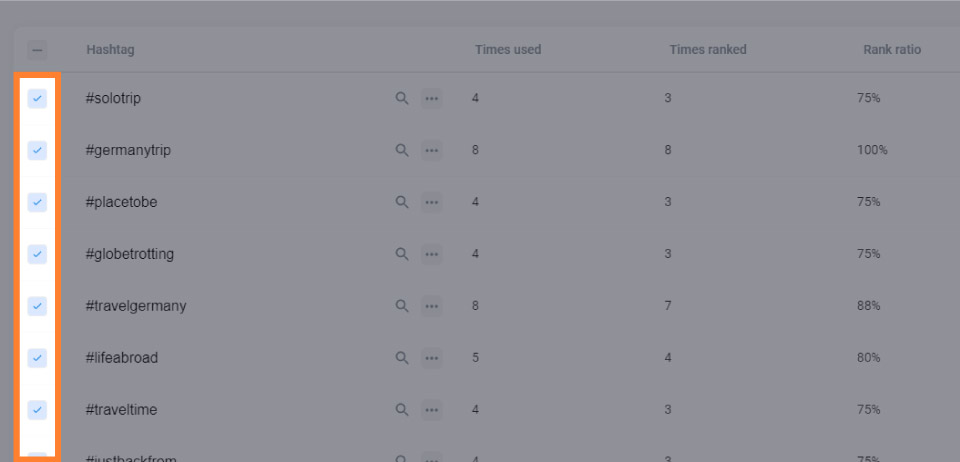
Then create a 'Top Performing Collection':
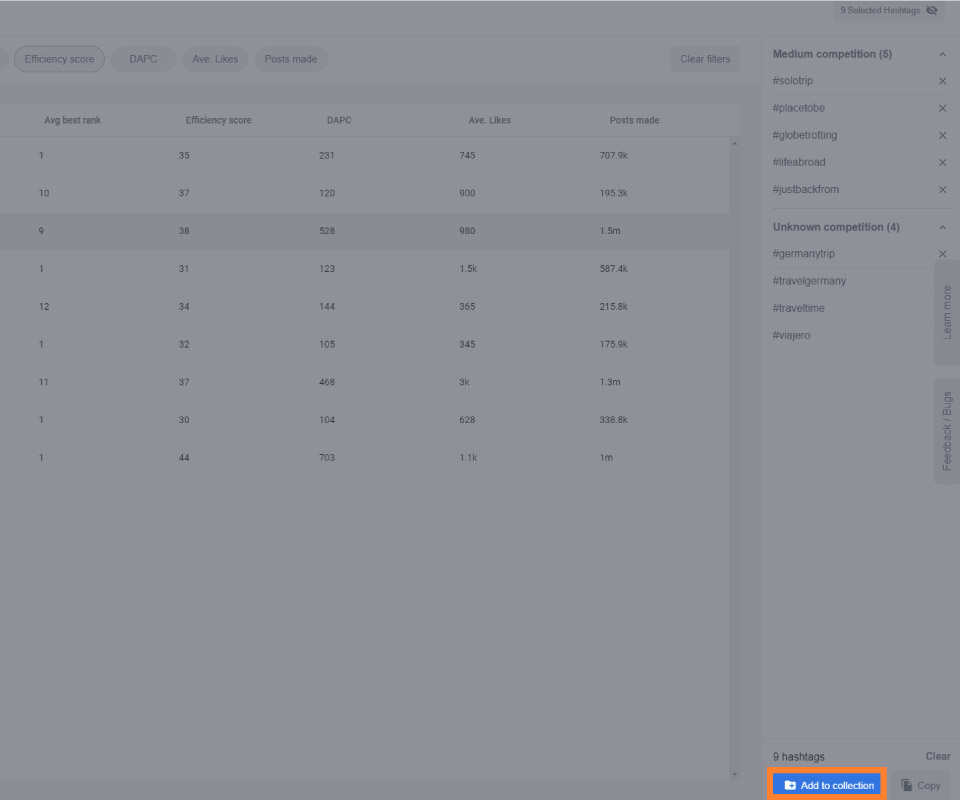
If you don't have enough Hashtags to add to a collection...
...you can Expand your search by using the Search Icon on your highest Efficiency Score hashtags:

Bonus Tip: Import Your Previously Used Hashtags Into a Collection
If you've already been using hashtags before using Flick and want a quick way to create a collection of them then...
...Visit your Collections Dashboard:

Then Create a New Collection:
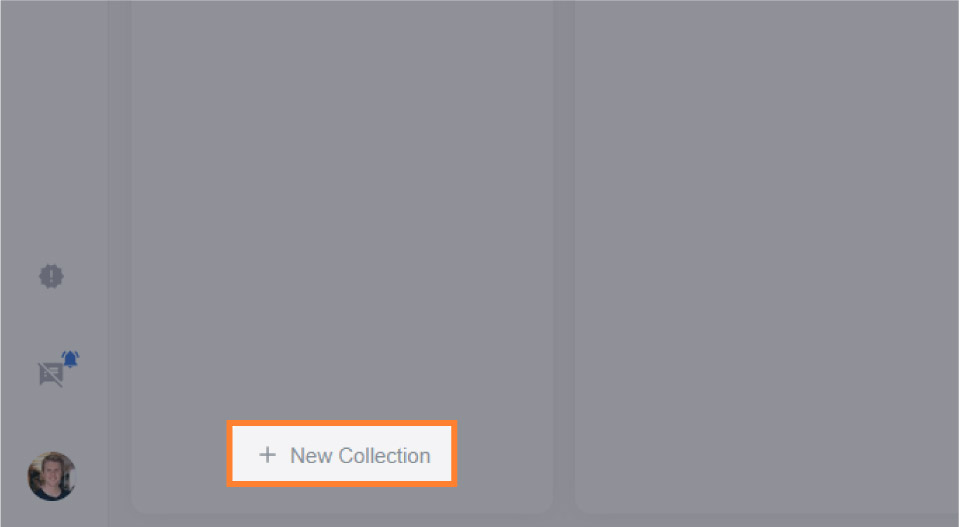
After you've made your collection...
...click on Actions > Import from post:
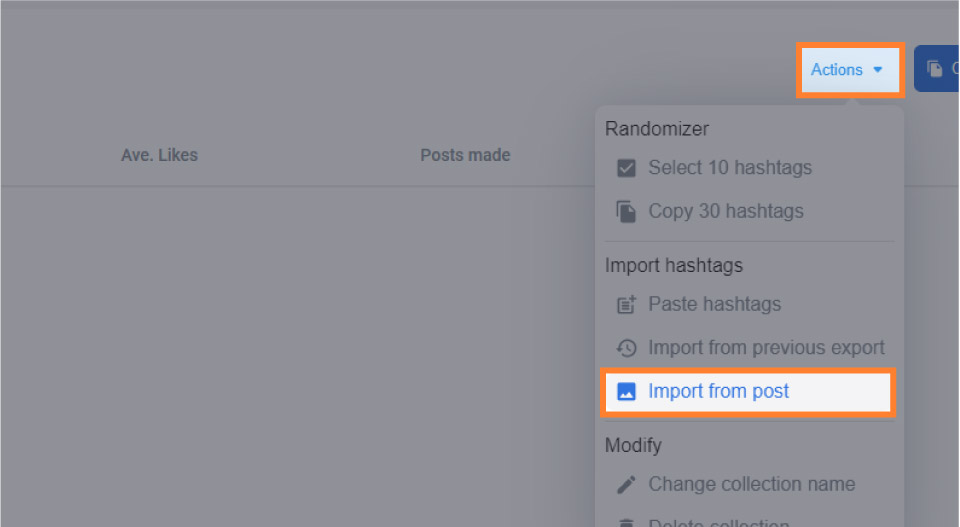
Select your post and you'll have a list of your hashtags used in the caption or comments!


Did something stand out? Let me know your thoughts below!